
DHXScheduler.XY
In the scheduler you are allowed to configure sizes of the elements.
To set the desired option, write it as it's stated in this documentation changing DHXScheduler to the name of your DHXScheduler instance.
var sched = new DHXScheduler();
...
sched.XY.bar_height = 30;
Dimension configuration:
| Property | Description | Default value | Applicable views |
|---|---|---|---|
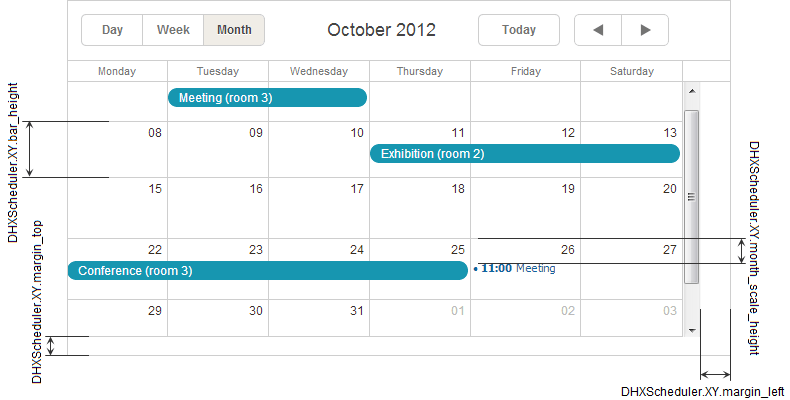
| DHXScheduler.XY.bar_height | the height of day cells in the month view | 20 | month |
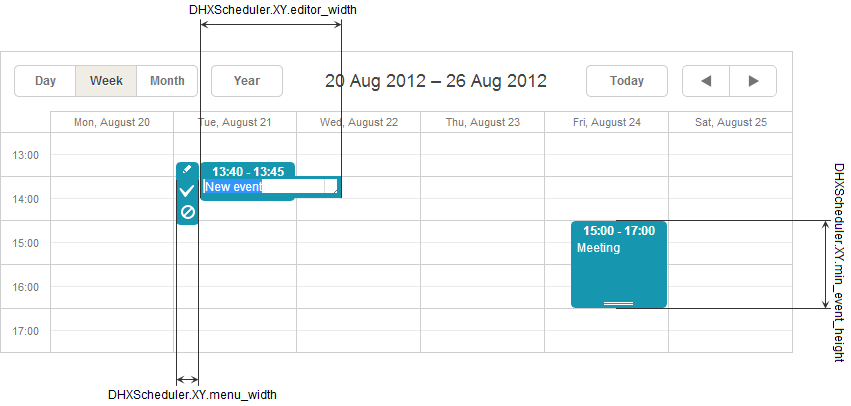
| DHXScheduler.XY.editor_width | the width of the event text input | 140 | day, week, units |
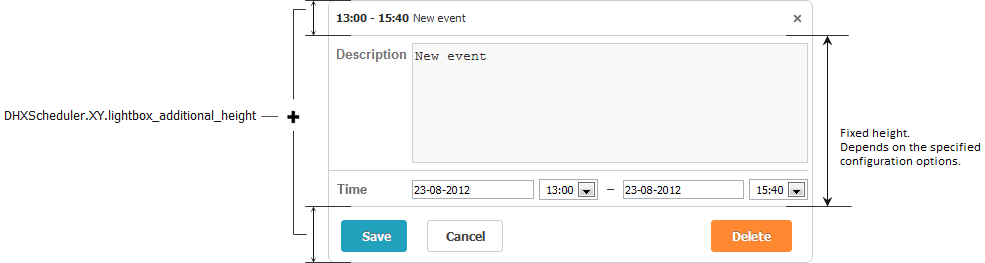
| DHXScheduler.XY.lightbox_additional_height | increases the length of the lightbox | 50 | all views |
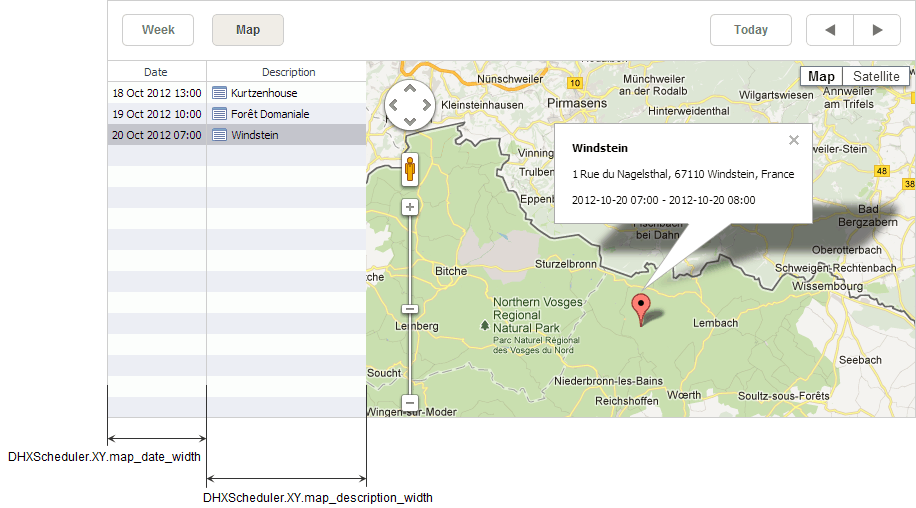
| DHXScheduler.XY.map_date_width | the width of the date column in the map view | 188 | map |
| DHXScheduler.XY.map_description_width | the width of the description column in the map view | 400 | map |
| DHXScheduler.XY.margin_left | the left margin of the main scheduler area | 0 | all views |
| DHXScheduler.XY.margin_top | the bottom margin of the main scheduler area | 0 | all views |
| DHXScheduler.XY.menu_width | the width of the selection menu | 25 | day, week, units |
| DHXScheduler.XY.min_event_height | the minimal width of the event box | 40 | day, week, units |
| DHXScheduler.XY.month_scale_height | the top offset of an event in a cell in the month view | 20 | month |
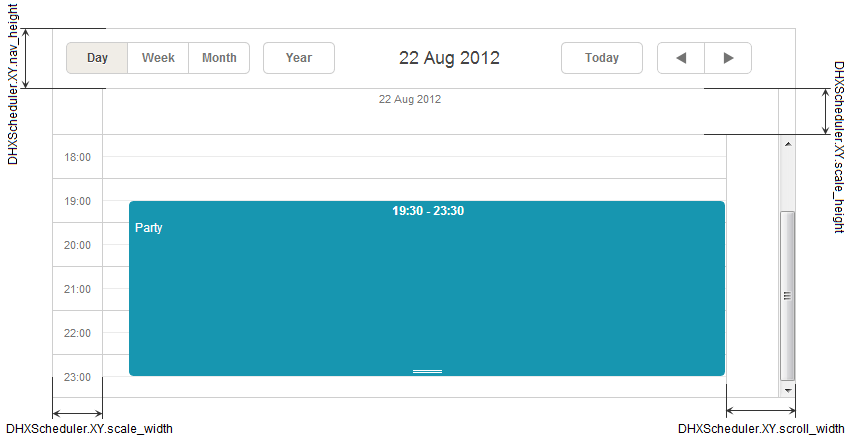
| DHXScheduler.XY.nav_height | the height of the navigation bar | 22 | all views |
| DHXScheduler.XY.scale_height | the height of the X-Axis | 20 | all views |
| DHXScheduler.XY.scale_width | the width of the Y-Axis | 50 | day, week, timeline, units |
| DHXScheduler.XY.scroll_width | the width of the scrollbar area | 18 | all views |
Month view
Week view
Day view
Map view
Lightbox
comments powered by Disqus